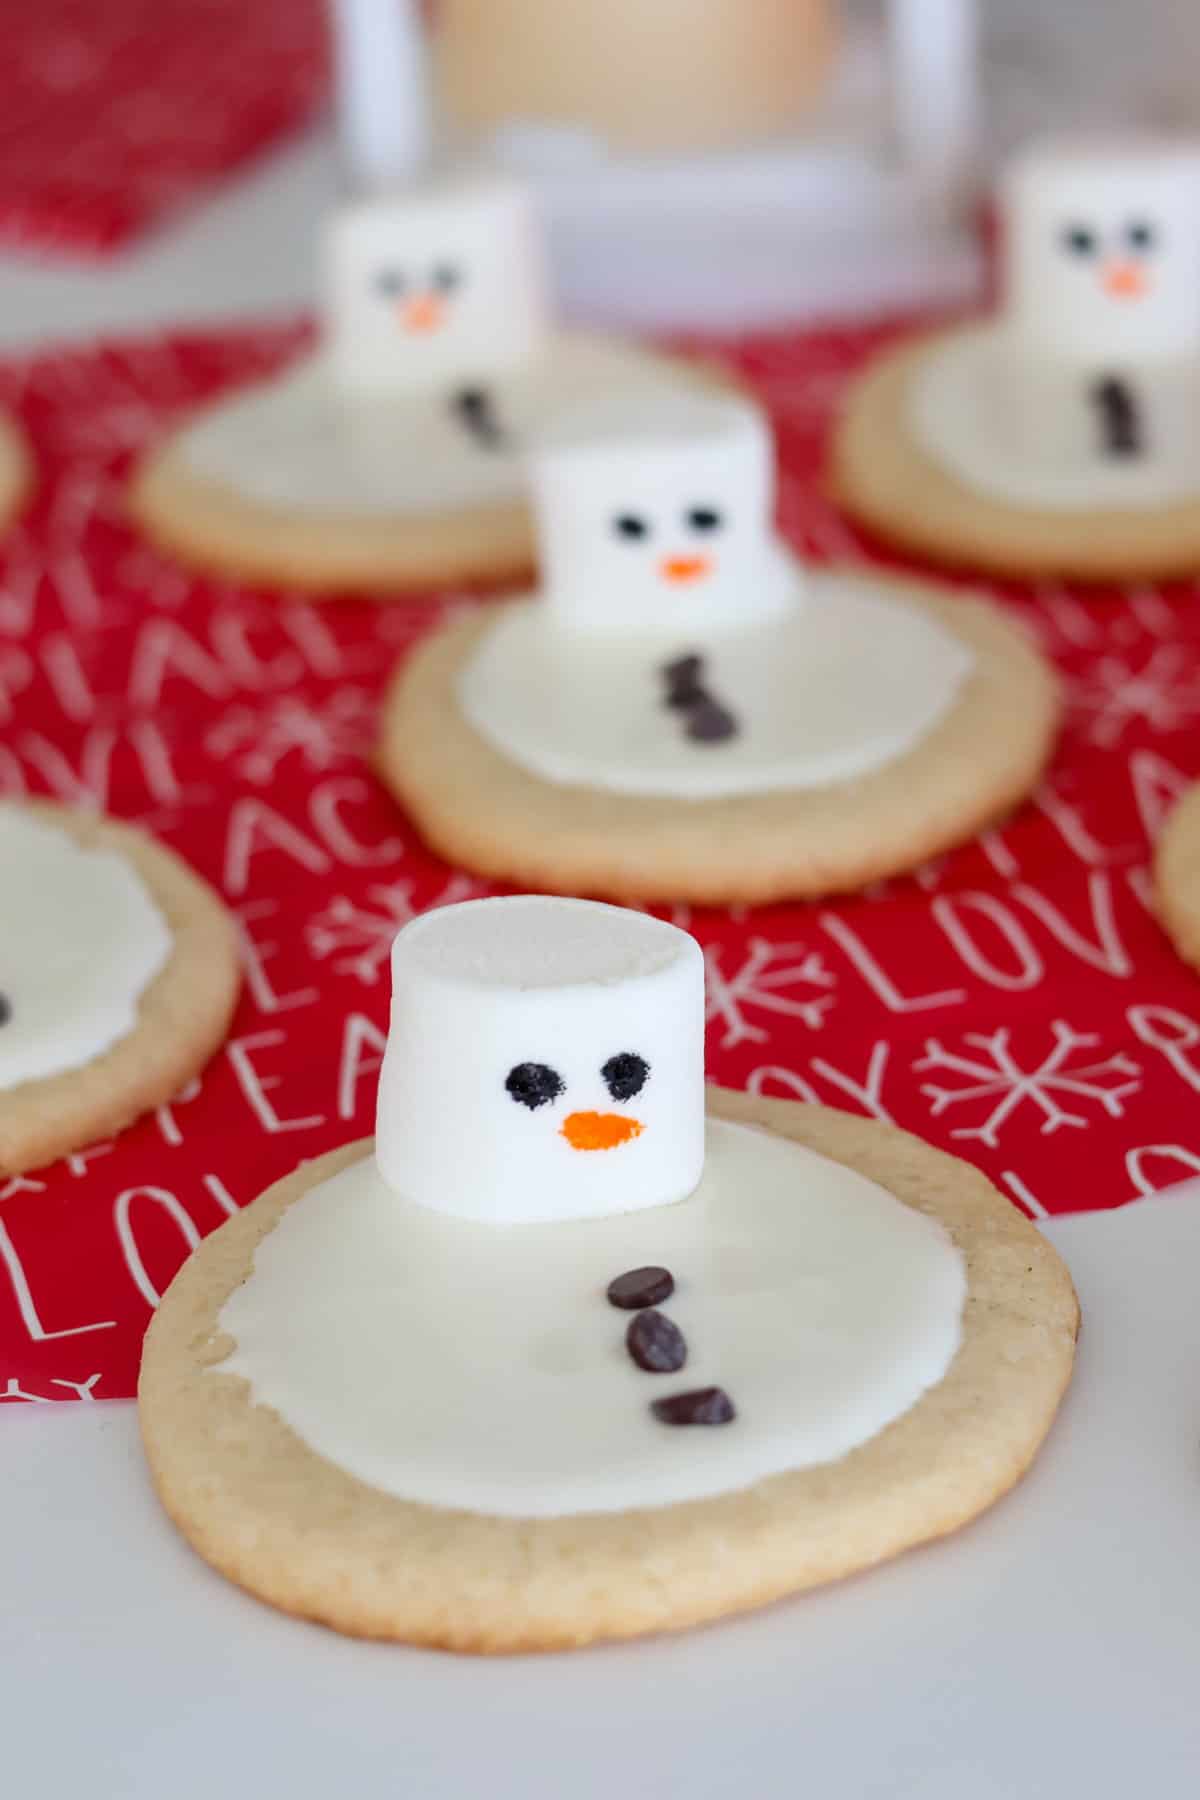
The holidays are here and that means it is time to make my annual Melted Snowman Sugar Cookies. Delicious vanilla frosting combines with a soft and chewy sugar cookie and is topped with a marshmallow for an irresistible winter favorite.
Quick Look: Melted Snowman Sugar Cookies
- ⏱ Prep Time: 10 minutes
- 🔥 Cook Time: 13 minutes
- ☃️ Decorating Time: 12 minutes
- ⏳ Total Time: 35 minutes
- 🍪 Serving: 1 Cookie
- ⚡ Calories: 104 calories per cookie
- 🍂 Flavor Profile: soft, buttery, and sweet with holiday cheer
- 👌 Difficulty: Easy, a perfect cookie to make with the kids
SUMMARIZE & SAVE THIS RECIPE ON:
Melted snowman cookies have been a tradition in my house for many years. My kids have always loved getting out the cookie sheets and getting to decorate the melting snowman exactly as they wanted. If you have little ones, they will love my Christmas Celebration Cookies too.
After years of cookie recipes and exchanges, I knew it was time for these to be shared with all of you. If you are looking for other cookie recipes then you have to check out my Christmas Cookie Sandwiches. If cakes are more your vibe then don't forget to check out my other dessert recipes.
Why You Will Love This Recipe
- Easy Recipe: This is a simple melting snowman cookie recipe, so you just mix add a few quick decorations.
- Soft and Chewy: This cookie features a soft and chewy middle that pairs perfectly with the vanilla icing.
- Decorating Fun: Cookie icing is the perfect time for kids, and adults, to enjoy their creative side.
- Winter Favorites: Melting snowman cookies aren't just for the holidays. They can a fun treat all winter long!
Key Ingredients
You'll find a full list of ingredients and their exact amounts in the recipe card at the bottom of the post.
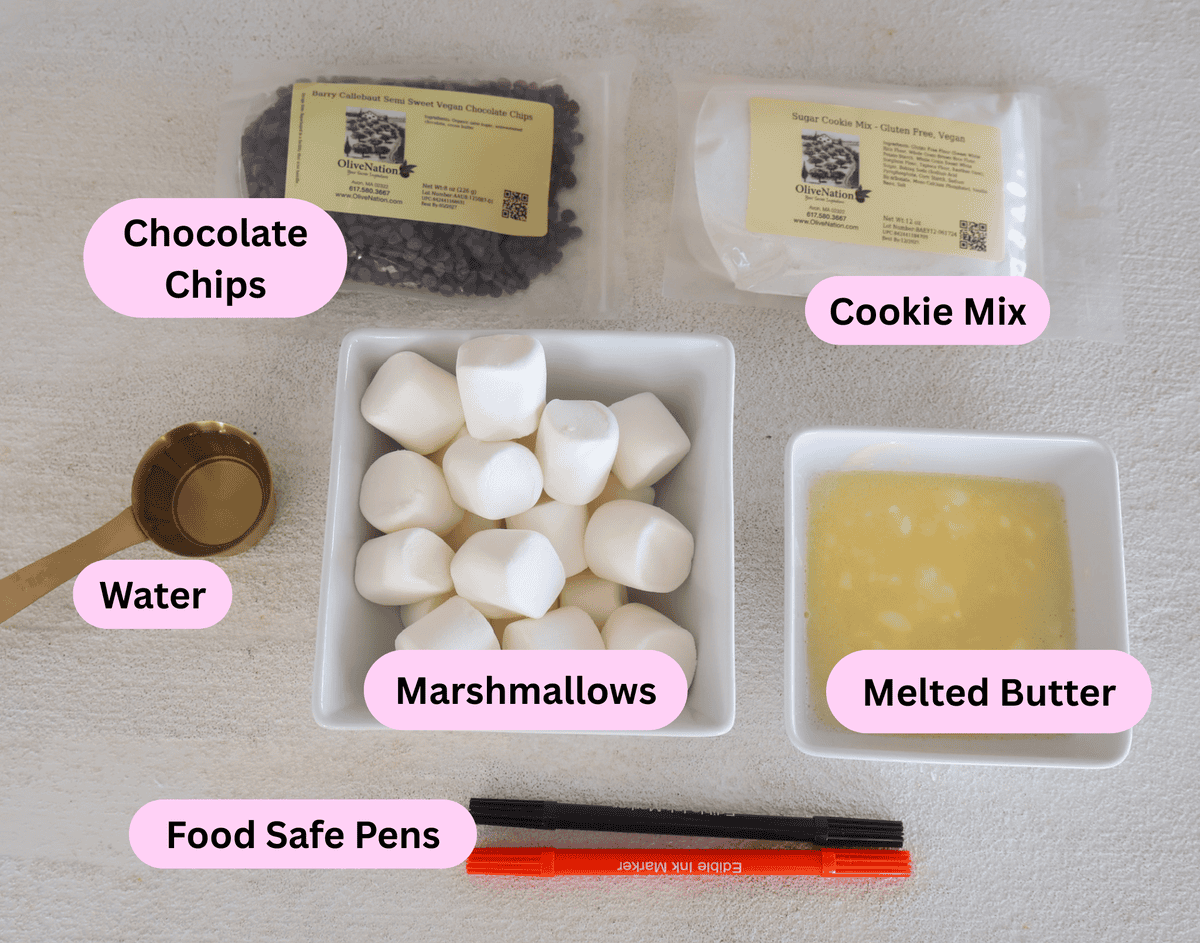
- Olive Nation Gluten Free Sugar Cookie Mix: I used Olive National Sugar Cookie Mix for my cookies. It saves time and they always turn out great.
- Marshmallows: These are the star of the show. Make sure you get the normal size ones so they match the size of the cookie.
- Food Safe Pens: I used food safe pens to help save time while decorating these marshmallow snowman cookies. You can also use food gel if you prefer.
- Frosting: You can use any frosting to for Christmas snowman cookies. If it is a bit runny that works best because it will help give a melted look to your cookies!
⭐️⭐️⭐️⭐️⭐️
"My family has loved this one since the day we found it. The kids always ask to make these when we they are out on Christmas break. This recipe will be in family photo albums for years to come." - Michelle
Variations
- Decorations: I was using black and orange food pens to save time but you can use food safe black gel and orange gel to make decorating even more fun.
- Accessories: You can give your melting snowman sugar cookies and extra touch with chocolate chips for buttons or you can use pretzels for more realistic arms! My Pretzel Chocolate Chip Cookies are great inspiration to help with this!
- Cookie Dough: The preference is all yours. You can use snicker doodle, peanut butter, or even chocolate cookie dough. These will all help the melted snowman cookies recipe stand out.
- Allergy Friendly: You can easily swap to dairy-free ingredients or traditional flour if you do not have a gluten allergy.
How to Make Melting Snowmen Cookies
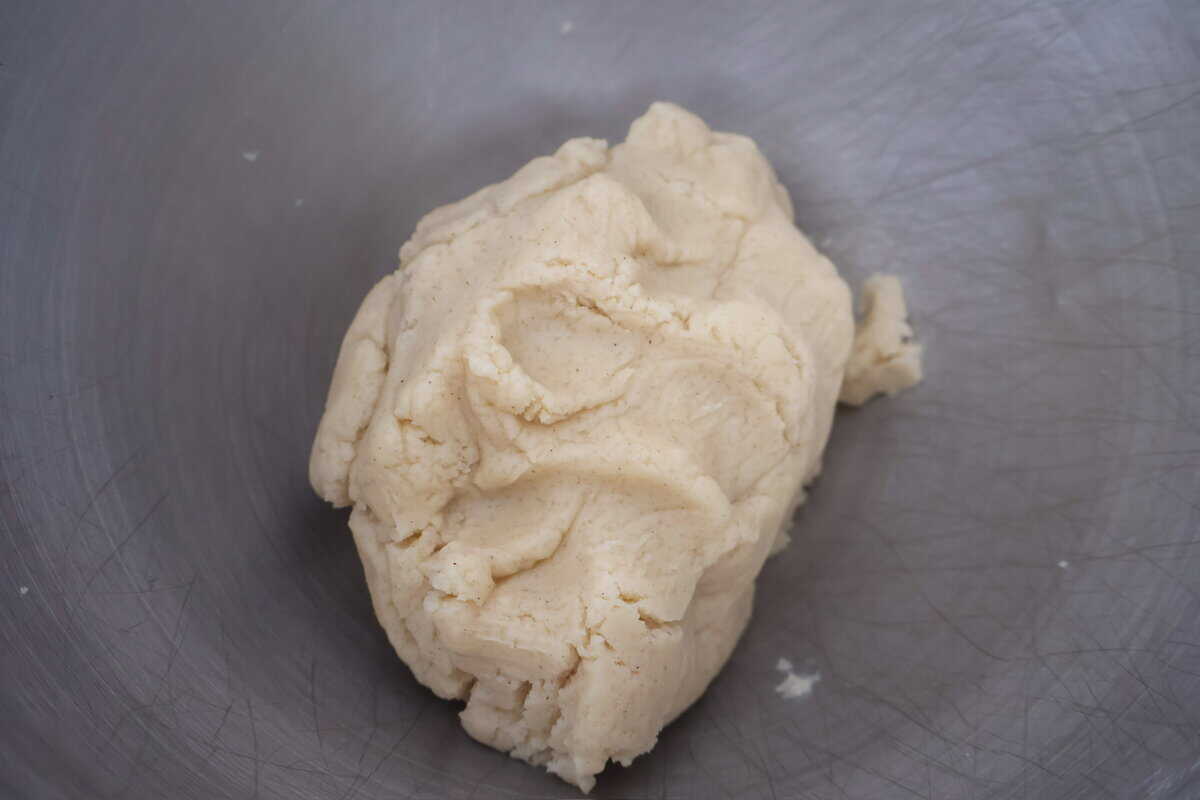
Step 1. Add melted butter (or Vegan alternative) and water to 12 oz. of Sugar Cookie Mix in a mixer. Mix until fully blended.
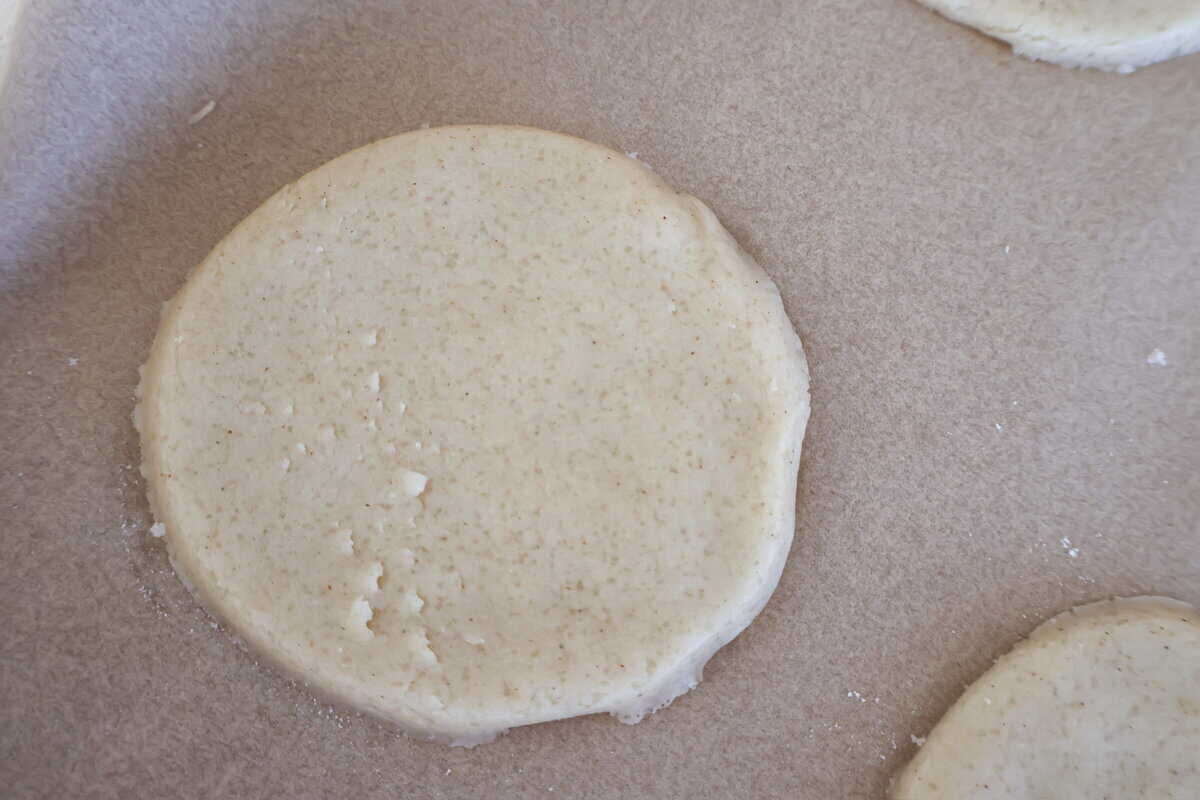
Step 2. Roll out the dough to ¼" thickness. Cut out shapes with cookie cutters and gently transfer to baking sheet lined with parchment paper.
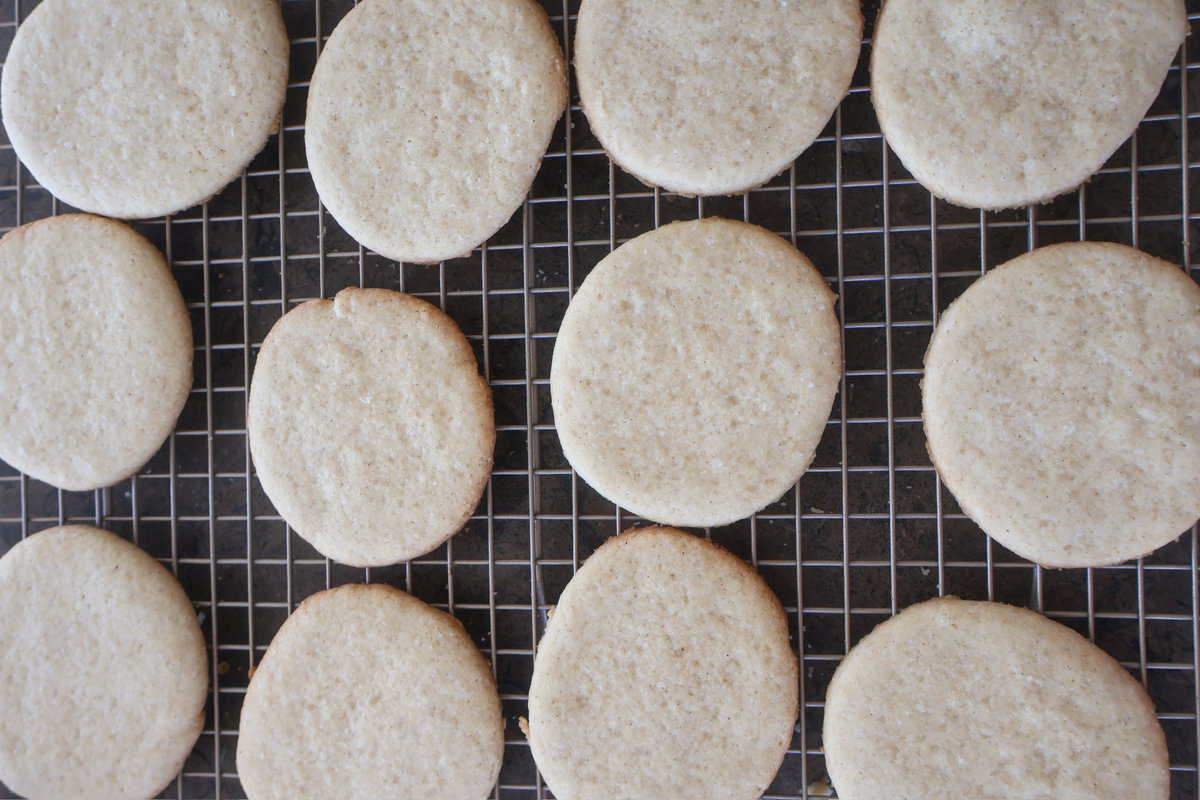
Step 3. Bake the cookies for 10 to13 minutes in a pre-heated 350°F oven until the edges begin to brown slightly. Then, place the cookies on a baking rack and allow them to cool for 15 minutes before frosting.
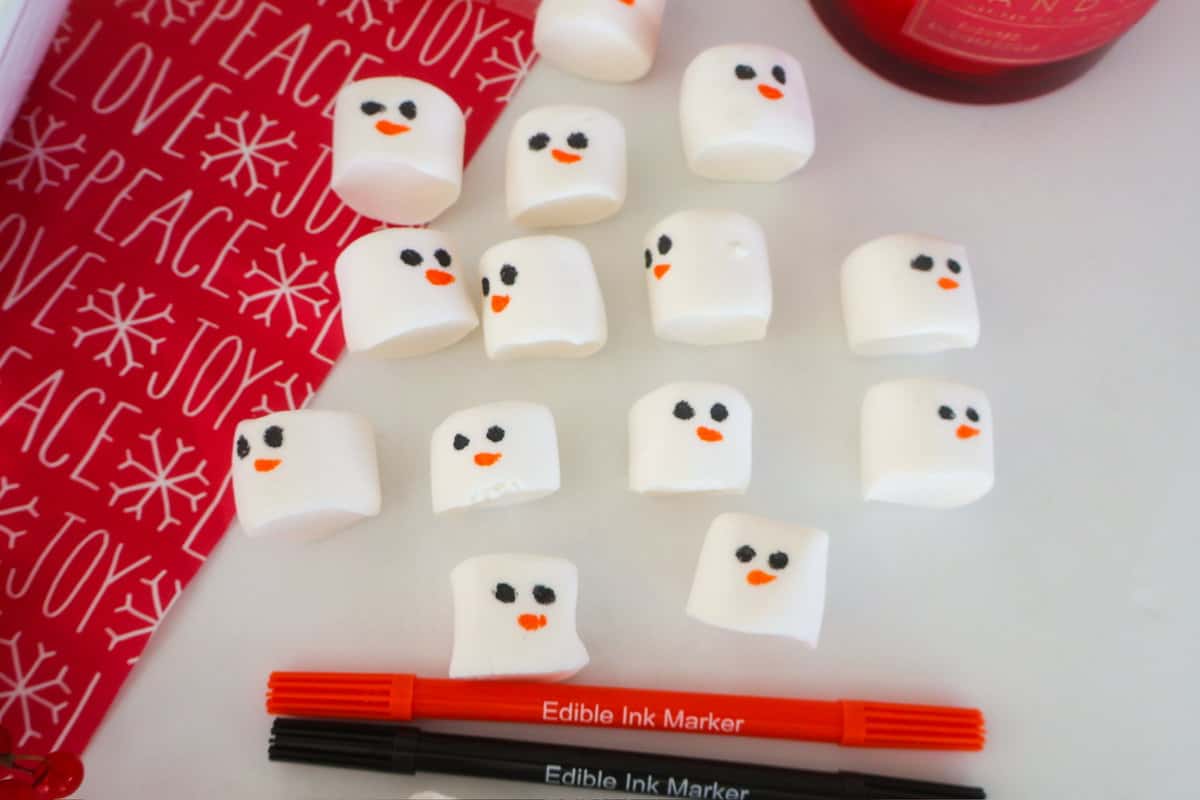
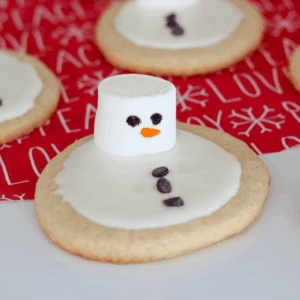
Step 4. While they are cooling, cut off the bottom ⅓ of the marshmallow. Then using either cookie icing or edible markers, draw the two eyes and carrot onto the marshmallow.

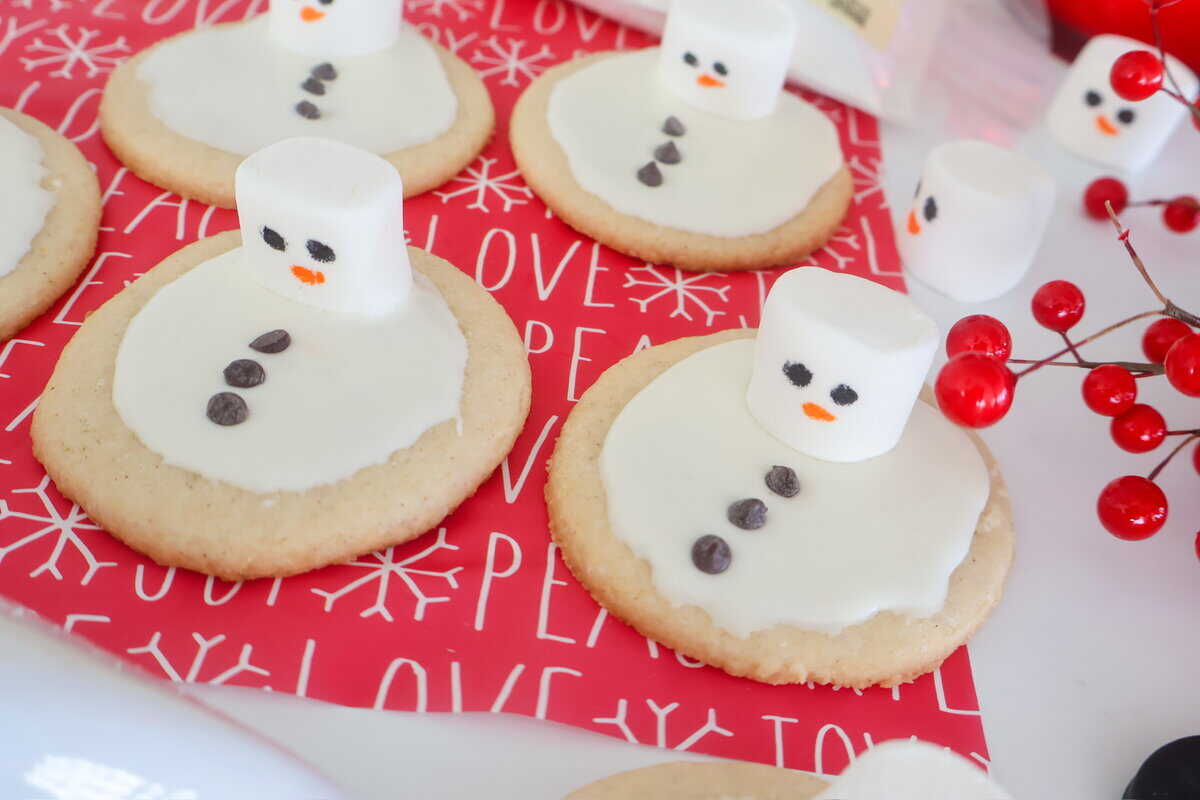
Step 5. Frost your cookie with the icing of your choice.
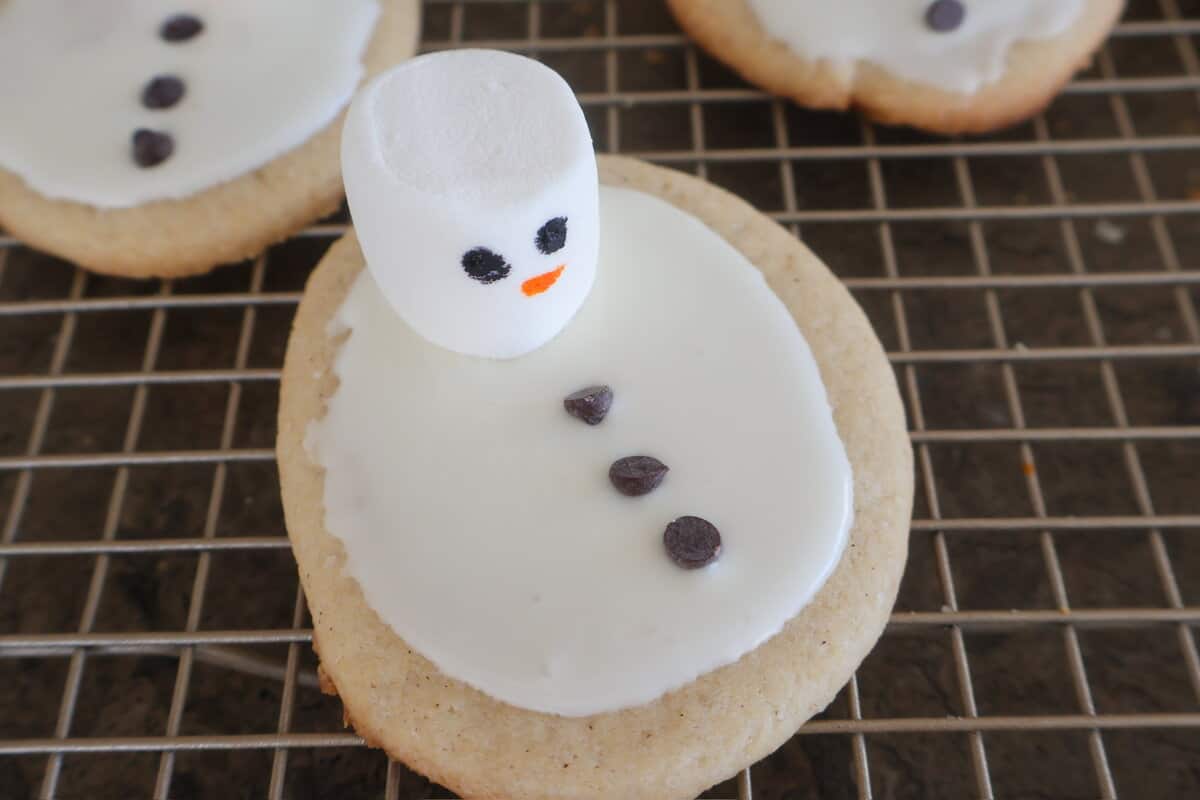
Step 6. Place the marshmallow onto the cookie base while the frosting is still wet. Then place three chocolate chips as buttons before the icing hardens. Add other decorations of your choice and enjoy!
Expert Tips
- Don't Overmix the Dough: Over-mixing the dough can make the cookies tough and dry. This is true for both wheat flour and gluten free flour.
- Measure Properly: Measure your flour by weight or loosely spoon it into your measuring cup and level it off with a knife to avoid compacting.
- Use Fresh Baking Soda: So many people forget to check their leaveners for freshness. If they're expired, your cookies won't rise properly.
- Cool the Cookies Before Decorating: Makes sure let the cookies cool before icing them. If they are too hot the icing won't be able to solidify and will leave you with an unwanted mess.
Melted Snowman Sugar Cookies FAQs
Yes! Sprinkles and cookies go together like salt and pepper. The kids will love it and it makes these winter days that much more fun.
I love adding a little lines for twig arms! I think a scarf around the base of the marshmallow is also such a cute way to add some color to the cookie. Finally, you can use any candy for buttons so pick something the kids will love!
Yes! All of my website is gluten free but you can easily use regular flour if you do not have a gluten allergy!


★ Did you make this recipe? Don't forget to give it a star rating below! I would love to hear back from you! You can also FOLLOW ME on Instagram, Pinterest, Facebook, and TikTok for more social media content and delicious recipes.
📖 Recipe
Melted Snowman Sugar Cookies
Video
Equipment
- 1 food safe pens
Ingredients
- 1 package Olive Nation Gluten Free Sugar Cookie Mix or any sugar cookie mix of your choosing
- 1 Stick butter melted
- 1 tablespoon butter melted
- 3 tablespoon water
- 1 Sugar cookie frosting of your choice
- 15 marshmallows
- ½ cup Gluten Free 1:1 Flour or traditional flour if you do not have a gluten allergy
Instructions
Making the Cookies
- Add melted butter (or Vegan alternative) and water to 12 oz. of Sugar Cookie Mix in a mixer. Mix until fully blended.
- Carefully coat a non stick surface with a bit of gluten free flour.
- Roll out the dough to ¼ inch thickness.
- Cut out shapes with cookie cutters and gently transfer to baking sheet lined with parchment paper.
- Bake 10-13 minutes in pre-heated 350°F oven until the edges begin to brown slightly.
- Place the cookies onto a baking rack and allow them to cool for 15 minutes before frosting. Cool completely before frosting or decorating.
Decorating the Cookies
- While they are cooling, cut a small amount of the marshmallow off. Then using either cookie icing or edible markers, draw the two eyes and carrot onto the marshmallow.
- Frost with your choice of sugar cookie frosting.
- Place the marshmallow onto the cookie while the frosting is still wet. Then place the three chocolate chips as buttons while it is still wet. Allow them to cool before serving. Enjoy!
Notes
- Remove the Cookies Before They're Done: Your cookies should be golden on the edges and soft in the center. Carryover cooking from the hot baking sheet will finish them to perfection. Remember, a fully baked cookie is an OVERBAKED cookie!
- Use Parchment Paper: Line your baking sheet with parchment paper for easy cleanup.
- Perfectly Round Cookies: For pretty, perfectly round cookies, place a large cup over each cookie when removed from the oven, then use a circular, swirling motion to round the edges.


Comments
No Comments