This Vegan Mini eggs with Protein are an absolute favorite in my household because they taste JUST like their store-bought cousins. These little cuties are perfect for a protein-packed "grab-and-go" snack or decadent two-bite dessert. Want to know the best part? They are free of refined sugar, dairy, and gluten when made with both peanut butter and chocolate gems that are vegan and free of refined sugar. The addition of vegan protein powder and coconut oil really round out the healthy lineup of these 4-ingredient bite-sized delights.

Quick Look: Vegan Mini Eggs | Reese's Egg
- ⏱ Prep Time: 25 minutes
- 🔥 Cook Time: 5 minutes
- ⏳ Total Time: 30 minutes
- 🍫 Servings: 12 candy eggs
- ⚡ Calories: 277 calories per serving
- 🍂 Flavor Profile: Think Reese's Cups but even better and more festive!
- 👌 Difficulty: Medium - Make sure you have the right mold and this will be a breeze!
SUMMARIZE & SAVE THIS RECIPE ON:
Sure, they're great for an Easter treat, but you can use any shaped silicone candy mold to really customize them for any occasion or holiday. No matter what shape you make them in, they will disappear very quickly. They are not only a healthier alternative to regular candy, but they will help to keep your hunger at bay, thanks to the protein and healthy fat combo that they are packing.
Jump to:
Ingredients
See the recipe card for quantities.

Flavor Variations
Try substituting almond butter, or your favorite nut-free butter for the peanut butter. (e.g. sunflower butter) You may also substitute dark chocolate or white chocolate for the chocolate gems.
How to Make Vegan Mini Reese's Eggs
Prepare the molds:
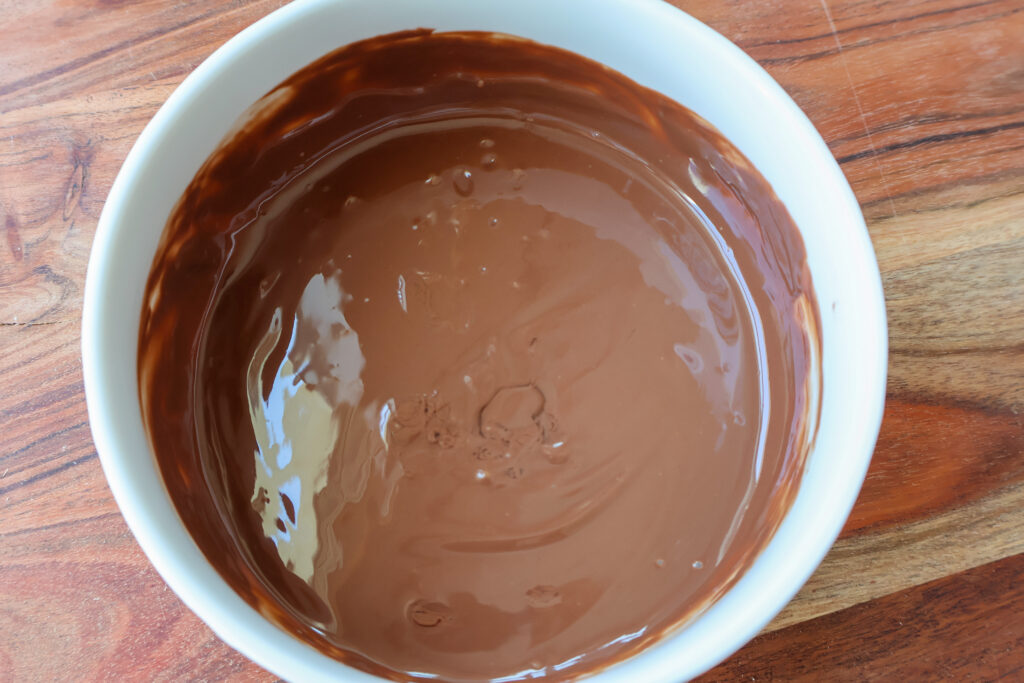
- First, combine half of the chocolate and 1 tablespoon coconut oil in a microwave-safe bowl. Then, use the melt setting on your microwave and melt the chocolate and coconut oil. Use 30-second increments, stirring in between each increment. (Select 50% power if your microwave doesn't have a melt setting) DO NOT overcook.
- Next, place 1-1 ½ tablespoon of chocolate into the bottom of each silicone mold and place the chocolate-coated molds in the freezer for at least 10 minutes. This will harden the chocolate enough to put the next layer in the mold.
Fill the molds:
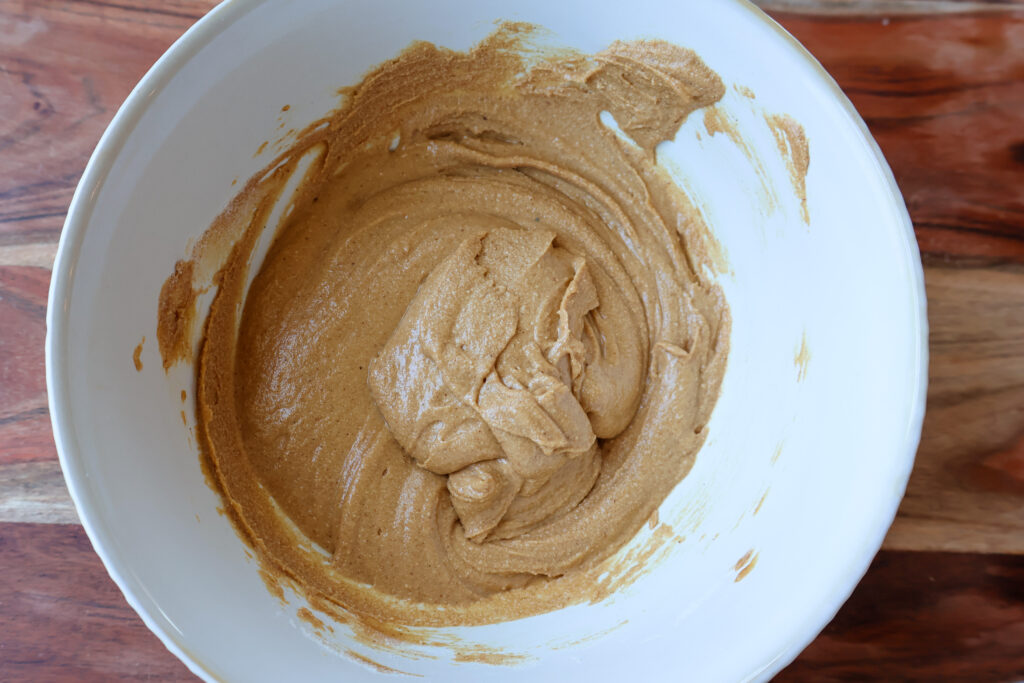
- Meanwhile, while you are waiting for the chocolate to harden, place the peanut butter in a microwave-safe medium-sized bowl and warm it for 15-20 seconds until it has the consistency of a thicker liquid.
- Next, remove peanut butter from the microwave and stir in protein powder or collagen powder and mix until it becomes a soft pliable dough-like consistency.
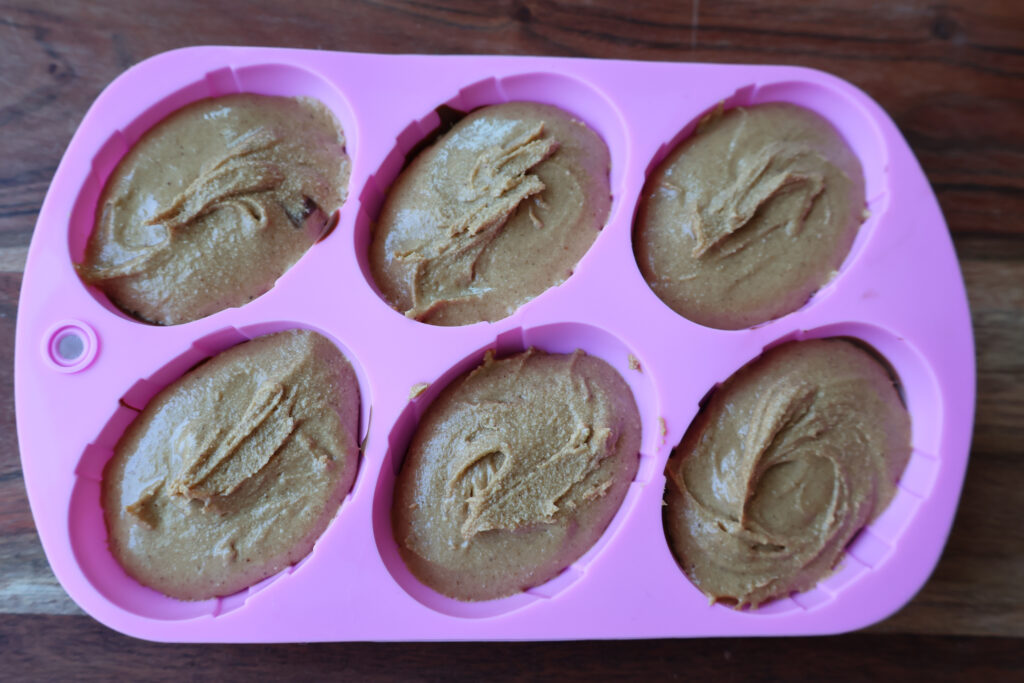
- After waiting at least 10 minutes, remove the molds from the freezer. Use a 1 TBS cookie scoop, to add one scoop of your peanut butter mixture to each silicone mold. Then, use the back of a spoon to smooth the peanut butter into an even layer in each mold. After smoothing the peanut butter, place the molds in the freezer for 30 minutes to allow the peanut butter layer to set.
- Next, once the peanut butter layer has hardened, melt the remaining chocolate and coconut oil in the microwave. *Use the same method as step 1 above.
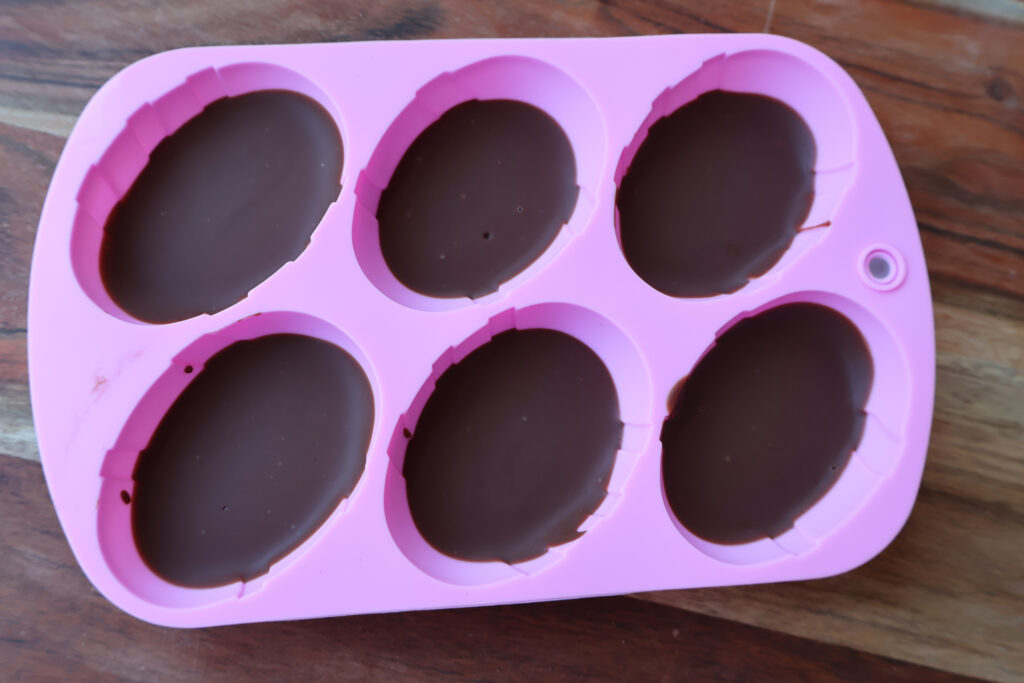
- Then, remove the silicone molds from the freezer, and repeat step 2 with the remaining chocolate from that step. Afterward, layer the chocolate on top of the frozen peanut butter. *Reheat the chocolate exactly as listed in step 2.
- Once all of the molds have been topped with the remaining chocolate, place them in the freezer again, this time for at least 2 hours. To keep the eggs from melting once they are made, store the finished eggs in an airtight container lined with parchment paper in the fridge for up to 2 weeks.
Storage
To keep the eggs from melting once they are made, store the finished eggs in an airtight container lined with parchment paper in the fridge for up to 2 weeks.
More Easy Holiday Recipes
Try these other delicious dessert or snack recipes:


★ Did you make this recipe? Don't forget to give it a star rating below! I would love to hear back from you! You can also FOLLOW ME on Instagram, Pinterest, Facebook, and TikTok for more delicious recipes.
📖 Recipe

Vegan Mini Eggs | Reese's Egg
Ingredients
- 1 cup peanut butter
- ½ cup protein powder/collagen or a mixture of both
- 1 ½ cup chocolate gems
- 2 tablespoon melted coconut oil
Instructions
- First, combine half of the chocolate and 1 tablespoon coconut oil in a microwave safe bowl. Then, use the melt setting on your microwave (or select 50% power if your microwave doesn't have a melt setting) and melt the chocolate and coconut oil in 30 second increments, stirring in between each increment. DO NOT overcook.
- Next, place 1-1 ½ tablespoon of chocolate into the bottom of each silicone mold and place the chocolate coated molds in the freezer for at least 10 minutes. This will harden the chocolate enough to put the next layer in the mold.
- Meanwhile, while you are waiting for the chocolate to harden, place the peanut butter to a microwave safe medium-sized bowl and warm it for 15-20 seconds, until it has the consistency of a thicker liquid.
- Next, remove peanut butter from microwave and stir in protein powder or collagen powder, (I like to use both) and mix until it becomes a soft pliable dough-like consistency.
- After waiting at least 10 minutes, remove molds from freezer, and use a 1 TBS cookie scoop, to add one scoop of your peanut butter mixture to each silicone mold. Then, use the back of a spoon, or small offset spatula to smooth out the peanut butter into an even layer in each mold. After smoothing the peanut butter, place the molds in the freezer for 30 minutes to allow the peanut butter layer to set.
- Next, once the peanut butter layer has hardened, melt remaining chocolate and coconut oil in microwave *using the same method as step 1 above.
- Then, remove silicone molds from freezer, and repeat step 2 with the remaining chocolate from that step, and layer the chocolate on top of the frozen peanut butter. *you will reheat the chocolate exactly as listed in step 2. Once all of the molds have been topped with the remaining chocolate, place them in the freezer again, this time for at least 2 hours. To keep the eggs from melting once they are made, store the finished eggs in an airtight container lined with parchment paper in the fridge for up to 2 weeks.


Ronnie says
Can I ask if the coconut oil is “necessary? (High in saturated fats)
Also why would they or why do they melt once set but out of fridge, I thought of gifting these but worried the wouldnt survive.
Thank you!!
NKendrick says
Hi, the coconut oil helps to thin out the chocolate. you can skip it, you just might need to melt more chocolate and it will be thicker. They don't melt out of the fridge but do tend to "sweat" when they come out of the cold fridge into the humid air.
Allison says
Just made these and I just say they are even better than Reese’s! I used a silicone muffin pan and they worked out great.